 |
||
Navigation Topics Tutorials Others Contact |
PowerPoint - Normal modeToolbars IntroductionThe Slide mode lets you create slides and add other elements such as pictures, charts, sound and video and other objects. Before we beginBefore being able to begin, there are some elements that need to be cheked and maybe changed. They consist of the presentation's page layout pagination and the necessary toolbars to create the slides. The page layout
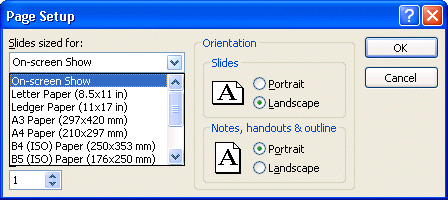
This option determines how your presentation, as well as that of the notes pages will be presented on screen or printed on paper. For the exercises on this page, and all those on this section of PowerPoint, the presentation will be made for the screen instead of on paper. So, the options such as shown in the picture below are correct. |
|
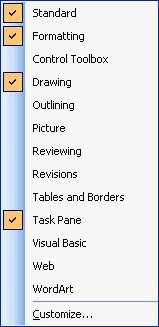 |
Here's is a way to move a toolbar if it's over the slide
If you think of using shapes on your slides, the Drawing toolbar has the AutoShape options in it. You can even create your own personalized toolbars and use them with the others offered by PowerPoint. |
Exercises
PowerPoint has several tools to help you create your presentation's slides that you'll find in the toolbars. The rest of the page will be dedicated to exercises using options on the toolbars to help you to understand the potential of these tools. You need to begin with a new presentation.
![]() From
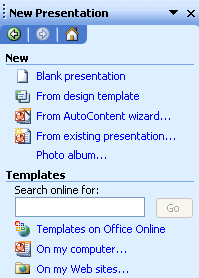
the File menu, select New option.
From
the File menu, select New option.
 |
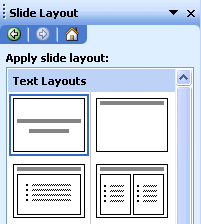
You need to choose the layout for the first slide of your presentation. You will need to select a layout every time you add a slide. In PowerPoint, there are 21 pre-established layouts. They help you to create a presentation as well as to add the objects that you need. In these layouts, you can add text, charts, pictures, tables and other types of objects. You can even have a combination of these on the same slide! You can also change the layout at any time to better answer your needs. But these predetermined layouts is what's generaly used. However, you can change the slide's layout to better suit your personnal needs. You can add as many objects as you want on the same slide ... as long as it makes sense. Remember the goal of your presentation is either to inform, to convince or a call for action. All the elements that you add to your presentation must help pass your message. |
 |
|
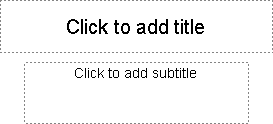
PowerPoint will show you the first slide with two boxes of text.
The cursor button is used to select objects. For example, you need to select an object before you may change, move or delete it.
Add of the text in both text boxes
![]() Press
the cursor button.
Press
the cursor button.
![]() Click
on the Click to add a title box.
Click
on the Click to add a title box.
![]() Write " Financial situation of the company "
Write " Financial situation of the company "
![]() Click
on the Click to add a subtitle box.
Click
on the Click to add a subtitle box.
![]() Write
in your name.
Write
in your name.
![]() Click
outside of two boxes.
Click
outside of two boxes.
Change the text's font size
You may change change the size, font and other options of the text that's inside these two boxes. But you need to select all the contents of the text box.
![]() Click on the box that contains your name.
Click on the box that contains your name.
![]() Select
all the contents of the box.
Select
all the contents of the box.
OR
![]() Click on the box that contains your name.
Click on the box that contains your name.
![]() Click on the border of the text box.
Click on the border of the text box.
Squares should appear on the corners of the box.
![]()
At the top of the screen, you'll should find the standard toolbar that contains the list of fonts (Arial, Times New Roman and many others). Beside it, is another box to select the font's size.
![]() Click
on the arrow that's on the right-hand side and select a size or write the new number for the
size of the text in the box.
Click
on the arrow that's on the right-hand side and select a size or write the new number for the
size of the text in the box.
![]() Increase
the size of your name to 40 points.
Increase
the size of your name to 40 points.
A point equals to 1/72-nd of an inch. You will notice that your name is much bigger than before.
The Drawing toolbar will be used for the next options.
![]() From
the View menu, select the Toolbars option.
From
the View menu, select the Toolbars option.
![]() From
the list of toolbars, select the Drawing toolbar.
From
the list of toolbars, select the Drawing toolbar.
 Change the
text's color
This small exercise consists in changing the color of the text of your name. If it's not already done, select the text that you want to change color.
![]() For
the exercise, reselect the box with your name.
For
the exercise, reselect the box with your name.
![]() Press
the
Press
the 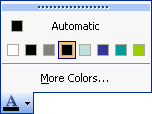 button.
The palette of colors most recently used will appear.
![]() Click
on the More colors option.
Click
on the More colors option.
![]() Select from the colors shown in the window.
Select from the colors shown in the window.
![]() Press the OK button.
Press the OK button.
 |
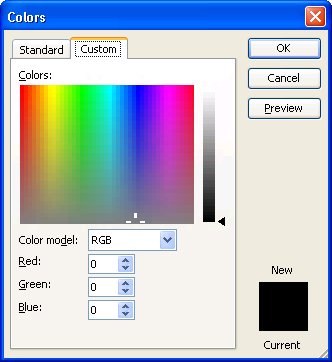 |
You can also choose your own color. You can determine your own color by mixing the from basic red, green and blue colors. You can place values from 0 to 255 to each to get a total of over 16 millions combinaisions!
Supplement
You can select a block of caracters or a single letterand change its font, its size or its color. Imagine your name with all the colors of the rainbow. Or that every character is smaller than the previous one. Give it a try!
 Add an additionnal Text box
You can also add a block of the text anywhere on the slide. You can write it outside of the two boxes of the slide. You will find the button above in the Drawing toolbar.
![]() Click
on the
Click
on the ![]() button.
button.
![]() Move
the cursor anywhere on the slide but not on any object already there such as the other two text boxes.
Move
the cursor anywhere on the slide but not on any object already there such as the other two text boxes.
![]() Click where you want to write the text.
Click where you want to write the text.
![]() Write
the text of your choice.
Write
the text of your choice.
You can then use the previous buttons to change the font, its size or its color.
 Free rotate
On the same toolbar, you will find the Free rotate button. It allows you to change the angle of the text boxes or must other objects on the slide. The next exercise consists in changing the angle of the text that you just wrote.
![]() Select
the text that you have just written by clicking this text.
Select
the text that you have just written by clicking this text.
A border should appear around the text.
![]() Click and hold the left mouse button on the button free rotate button above the text.
Click and hold the left mouse button on the button free rotate button above the text.
The border of the object will change. There will be only four squares at the extremities of the border.
![]() Move
the cursor on to one of these squares.
Move
the cursor on to one of these squares.
![]() Press and hold the left mouse button and move the cursor towards the left, the
right, up or down.
Press and hold the left mouse button and move the cursor towards the left, the
right, up or down.
You will notice that the text, or nay other object you selected, turns on itself.
![]() Do
not release the left mouse button until you're satisfied with the angle of your
text.
Do
not release the left mouse button until you're satisfied with the angle of your
text.
![]() Retry
and experiment little.
Retry
and experiment little.
There is a small trick you need to know.
![]() Re-select
the free rotate button.
Re-select
the free rotate button.
![]() Press the Shift key while rotating the object.
Press the Shift key while rotating the object.
The rotations will only be at 15 degrees intervals.
You may rotate some objects such as text and drawn objects. It's impossible to rotate an pictures or an OLE objects (graphs, organization charts or the others).
 Add an
oval
On the same toolbar as the free text and the free rotate buttons, you'll find the button above.
![]() Click on the button
Click on the button ![]() .
.
![]() Move
the cursor on the sheet of the slide.
Move
the cursor on the sheet of the slide.
![]() Click on the point where you want to start an oval, press and hold the left mouse button.
Click on the point where you want to start an oval, press and hold the left mouse button.
![]() Move
the mouse to where you want to end the oval.
Move
the mouse to where you want to end the oval.
You will see to appear the format that the oval will have when you'll have releaseed the left mouse button. By pressing on the Shift key, you'll observe that the oval becomes a perfect circle. The same situation happens for the rectangle button that becomes a square.
 Fill
colors and fill effects
You can also change the fill-in color or the color of the outline of any drawn object. The next exercise consists in changing the fill-in color of the oval. This option only works with drawn objects. It won't work with text. See the option for changing the color the text mentioned above.
![]() Click on the oval to select it.
Click on the oval to select it.
The border of the object and the squares should appear. Otherwise, click the oval.
![]() Press
the
Press
the 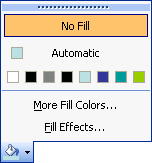 button.
![]() Select
from the shown colors.
Select
from the shown colors.
Or
![]() Click
on the More Fill colors option and choose from the colors that are
shown in the window.
Click
on the More Fill colors option and choose from the colors that are
shown in the window.
Change the fill effect of the oval
At any time, you can change the fill effect inside a form. You can change the color as well as put in a pattern or a picture. The next section shows you how.
![]() Select
the oval.
Select
the oval.
![]() From the Fill color button
From the Fill color button![]() , select the Fill Effects option.
, select the Fill Effects option.
![]() Select
the Gradient tab.
Select
the Gradient tab.
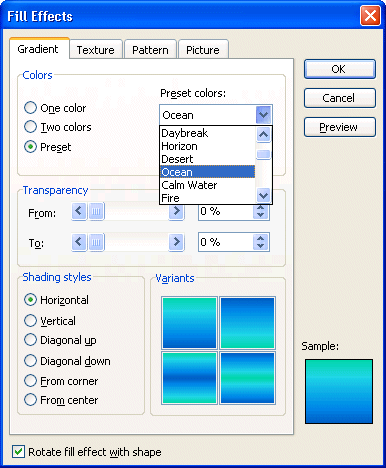
Under this tab, you can place a gradient fill on the object you selected. You can change the colors, the angle of the gradient and its tranparency. You can also press the Preview button to give you an idea of the final effect on your slide.
![]() Click
on the Texture tab.
Click
on the Texture tab.
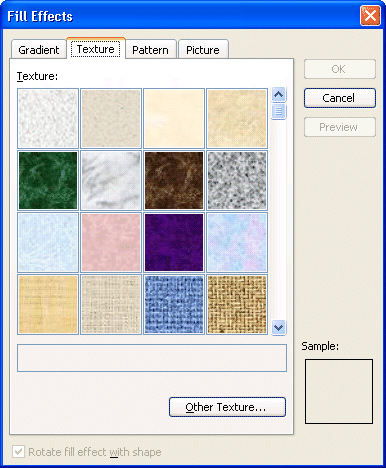
This window allows you to choose among predefined textures and to place it on the object you chose. You can also add other textures to the sampling you already have by pressing on the Other texture button.
![]() Click
on the Pattern tab.
Click
on the Pattern tab.
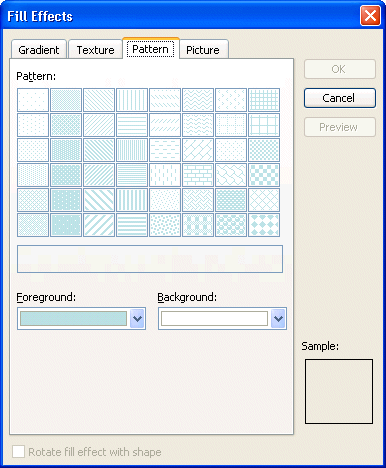
This window allows you to place patterns on the selected object. This option was available in the previous versions of the program.
![]() Click
on the Image tab.
Click
on the Image tab.
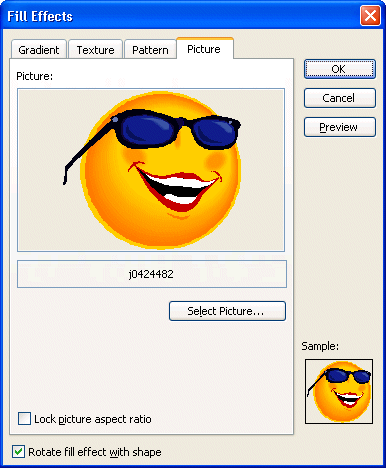
This window allows you to paste a picture inside the object that
you chose. You can also bring in a picture and
paste it. You may press the Select Picture button and get the picture that you want inside the object.
 Change the size of the oval
The next exercise consists in enlarging the oval so that it fills the entire slide. It will hide the other objects on the slide such as the text boxes. The next exercise will solve this small problem.
![]() Select
the oval.
Select
the oval.
Squares will appear around this one.
![]() Place
the cursor on one of these squares.
Place
the cursor on one of these squares.
![]() While pressing on the left button, move the square towards the border of the slide.
While pressing on the left button, move the square towards the border of the slide.
![]() Repeat
the operation until the oval is as big as possible.
Repeat
the operation until the oval is as big as possible.
Put the oval in background.
The oval should be as big as the slide to hide the text you wrote before. Each of the objects that you add to a slide is on it's own "layer". Every object that you add goes over, or top of, the other objects you added before. This option allows you to stack objects and give you a better presentation. But there are time you may wish to change the layers' order. Such as this example, you may want to place an object that's on top below some or all the other objects you already created.
At the moment, the oval is in front of all the others because it's the most recent object placed on the slide. To change the place of its layer:
![]() Click the
oval.
Click the
oval.
![]() From
the Drawing toolbar menu, selects the Drawing button.
From
the Drawing toolbar menu, selects the Drawing button.
![]() Select
the Order option.
Select
the Order option.
![]() Select to To the background option.
Select to To the background option.
The layer of the oval is now completely behind all the other layers. Experiment a little. Re-select the oval. Use the Drawing order command and move the oval gradually to the top and observe the result every time. The oval will move "forward" and to place behind it another object every time you use the combination of command Drawing, To move forward. You can also put off the layer of an object to place it behind the other that hides it. By controling the layers options, you may decide where you place some objects close to some others.
Pass from a slide to another
Press the PageUp or PageDown keys. Press of the buttons with two triangles located in the lower right corner of the screen.
The Next page
The next page will describe the outline options in PowerPoint's Normal mode.
