Navigation Topics Tutorials Others Contact |
PowerPoint - Outline modeIntroduction IntroductionYou may add slides one after the other to create your presentation by only using the slide options from PowerPoint's Normal mode. But there is a disadvantage to this technique. You have no global outline, or view, of your presentation. The Outline mode settles this problem and adds other advantages:
A presentation is rarely a place where you want to place long sentences, unless it's a quote from an important person. The text of your presentation should consist of keywords to make people understand the point that you want to make. A better term to describe the text that should be in your presentation would be a " punchline ". For example, to explain the reasons of the growth of sales, you could write " Increase of sales ". It's up to you after, during your presentation, to supply the explanations to the punchlines that you used. The contents of text of a slide can be cut in two parts: the main title, that explains the subject of the slide, and points to be covered on the subject.
|
|
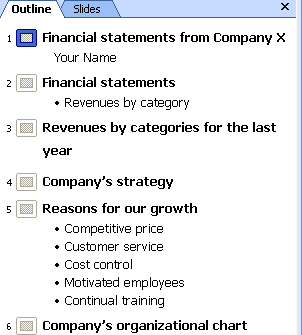
Writing textThe next part consists in writing all the text that will be required for a small presentation. You must give a presentation to the shareholders of the company X. You have already determined the text to write as well as at that level to put it on. In this example, there are only two levels: the main titles and the text of each of the six slides. Normally, you'll find the Outlining toolbar to the left of the section of the text. If not, from the View menu, select the Toolbars and Outlining options. You will need two of these buttons to change the level text. The other buttons will be explained when you'll have written the presentation's outline. Change level To change the level of a row, you should use the
The cursor should move on the third row. It should also have a small grey square that should appear to the left of the cursor.
At the moment, the last row is considered to be the main title for a new slide instead of being the text of the second slide (Financial statements).
Now, the row at the second level and is considered to be the text of the slide "Financial statements".
Move points aroundYou've noticed that one of the points in your presentation would be better placed at another location in your presentation. Instead of rewriting the text, you can make a block with the rows of text move it. Use both the move up or move down buttons to move the text in its new location in your presentation.
You will notice that rows rise and change slides. However, they always stay in the same level.
When you prepare a long presentation, you may get lost in the details. You may wish to see only the titles on the slides. The next buttons serve at temporarily hiding the text to only to show the main titles of the presentation.
The text of the slide is replaced by a horizontal row. This is to indicate that there is some text on this slide but that it's hidden.
The last two instructions are good at hiding or showing the text of a single slide. The next two buttons do make the same thing, but for all the slides of the presentation. Only the main titles will be shown.
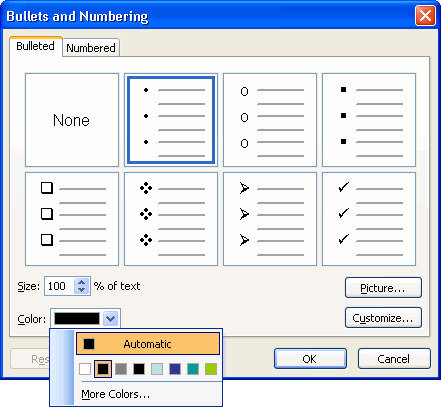
Changing bulletsIn front of every row of the second level or subordinate, a small character appears that's called a bullet. You may change it for another character or space.
The following dialog box will appear.
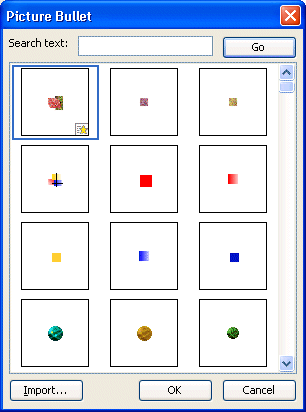
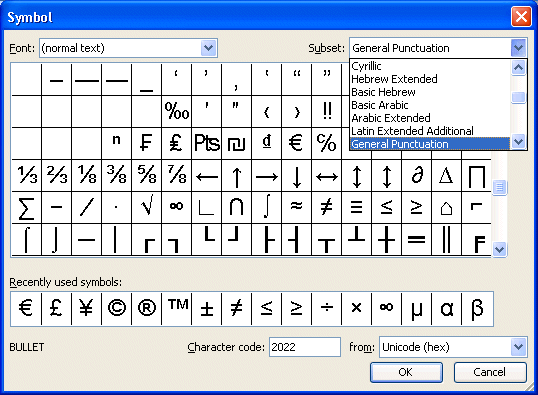
If you want to have no special character, click the first box in the upper left corner (none) and press the OK button. You can also change the size of the bullet by changing the size's percentage located to the left side of the window. There are the other special characters that you can take advantage of. You can place a picture or customize the bullet in many ways. Some fonts contain fanciful characters such as the Wingdings , ZapfDingbats BT , Symbol font, Monotype sort, Animals and several others.
View the resultHaving entered the text of the presentation, you deserve a look atthe result.
Once the presentation is ended, the slideshow mode will return you to the previous mode. In this case, it should be the outline mode. |
| You like what you read?
Share it with your friends. |