ULearnOffice.com

Navigation

Previous
Next
Homepage
FAQ
What's new
Sitemap

Topics

Excel 2007/2010/2013
File tab
Home tab
Insert tab
Page Layout tab
Formulas tab
Data tab
Review tab
View tab
Developer tab

Excercises
Autosum
Chart - Insert a second axis
Create a half-moon chart
Create a demographics chart
Conditional formatting
Data table
Pivot table
Scenario Manager
Solver

Tutorials

Word
Excel 2003
Excel 2007/2010/2013
PowerPoint
Access

Others

Demonstration files
Texte en français

Contact

By e-mail
Join our Newsletter


Excel 2010 - The File tab

Introduction
Save
Save as

Open

Open and repair

Close
Info

Protect workbook
Check issues
Manage versions

Recent
New
Print
Save and send

Send using e-mail
Send a link
Send as PDF
Send as XPS
Save as internet fax

Save to the Web
Save to SharePoint

Help
Options

General
Formulas
Proofing
Save
Advanced
Customize Ribbon
Quick Access Toolbar
Add-ins
Trust Center

Exit Excel


Introduction


Microsoft has completely changed it's menu structure for Word, Excel, PowerPoint and Access with Office 2007. All commands are now structured in a menu that Microsoft calls the "Ribbon". The commands are grouped in groups of commands under tabs. The intention was to regroup the commands according to the steps taken to create a document. This also implies the end of toolbar menus. The commands under this menu, by more of options of the application and a few other commands are now under the File tab that you will find at the top left of the window.

Office 2010 brings some new features. The Office button in version 2007 is replaced by the File tab. Also, the new File tab uses the entire screen to show all the possible options. Microsoft call this area the "backstage". You can "see" what's happening "behind the scenes". Before, Office only used part of the screen for the standard options. With Office 2010 and after, it uses the entire screen to show all the options. The extra space is well used to show the most recent files and folders that were used and a great print preview with the page setup options available to the left of the screen. You can change the most popular options at any time. You don't have to go back and fourth between the preview and the Page Layout tab.

You will find most of the commands that were under the File menu. You will also find the options to manage Excel under this menu and a few other surprises.

Info

File tab - Info

Compatibility mode

Excel 2013 - File - Info- Convert - Warning


Save

You must save your documents on a hard disk, a flash drive when you have finished the document. If this is not the first time that you save this workbook, you can use the Save bouton button from the Quick Access Toolbar.

Save as

Excel allows you to save a workbook under many file formats.

*Select the File tab and Save as.

Excel 2013- File - Save as

Micrsoft Excel offers many file formats to save the workbook; including in PDF format.

Excel workbook: The document will be saved in a file format that Excel will be able to reuse. But, it cannot contain any macro commands.

Excel macro-enabled workbook: An Excel workbook that contains macros. It's a chain of commands that is always executed in the same order. It can be very useful when you must execute repetitive tasks.

Unfortunately, some "hackers" have found a way to create dangerous macro virus with these commands. This is why there are now security levels integrated into every Office applications. Microsoft Excel will first you ask if you want open a workbook that contains macros. It's up to you to decide if you want the open the file or not.


Save as :

Excel 97-2003 workbook... : These versions of Excel all used the same file format. You should still consider this format if you work with other people that uses an older versions of Excel.

Microsoft offers a file converter for Office 97-2003 to convert and read to more recent file formats. But, you can save your documents in the older version if you wish.

Adobe PDF: The Adobe Acrobat Portable document file, or PDF, is very popular on the Internet. A new option in Office 2010 allows you to save directly into that file format.


Open

You want continue your work on a workbook you already started or work on a colleague's workbook? You must first open it.

*Press the File tab.
*If you have opened a document recently, there is a good chance that you find a reference under Recent.

*Otherwise, select Open.
*Select the drive and the folder where the workbook is located.
*Select the workbook and press the Open button.

Open and repair

Ouvrir et réparer

On rare occasions, a document may get corrupted. It may be because of a technical problem or you disconnected the USB key before you closed the file, the computer stopped working because of a power failure. Microsoft offers an option to Open and repair.

*Press the arrow at the end of the Open button.
*Select Open and repair.

Microsoft will try to repair the workbook. But, there are no garanties.

Close

This option will close the workbook document.

*Select the File tab and Close.
OR
*Press on the CTRL and W keys.

Info

Excel 2010 - File tab - Info

The Info option offers some information about the current document.

You can also protect your workbook or worksheet so that no other person can change it's content. You can also encrypt or place a digital signature on the document.

You can also check the document to make sure it doesn't contain personnal information, check if it's accessible to persons with disabilities and check compatibility with previons versions of Excel.

You can also try to recover unsaved versions of your document if Excel or your PC froze or shut down without giving you the possiblity to properly save your work.

Excel 2010 - File tab - Info - Protect Workbook

Excel allows you to share your workbook with others. As the manager, you can determine which revision you want to keep or remove. The first option lets you mark your document as final. At one point, the document creator or manager must decide to accept the changes and to mark the workbook as final.

Not only can you protect your work but you can also encrypt it and place a password to open it. Use only this option with the most sensitive files and with the approval or your employer. Be warned! Some software may still be able to "crack" these files.

You can also decide to protect a single worksheet or the entire workbook. If you look under the Review tab, you can allow users to edit ranges of cells. The rest of the workbook or worksheet would still be protected from change. You can also unlock cells from the Protection tab when you open the Dialog box launcher from the Font, Alignment or Number under the Home tab.

Mark as final

For the last few versions of Microsoft Office, il is possible of "share" documents on which many people can work on at the same time. You can have more to informations for this option under the Review tab. The "manager" of modifications doit regroup all the elements of versions and create a document final. This step consists to determine qu'il s'agit of the version finale the document and of conserver only the parties requises to create the document final. Make sure that all the personnes that avaient quelque chose a apporter to this document the have fait before of you rendre to this step.

*Press the File tab.
*Select the options Prepare and Mark as final.

Excel 2007 : Marquer final

A window will you inform you that the process will start.

*Press the OK button.

Excel 2007 : Confirme marquer final

This last window confirms that the document will be marked as final and any modification marks will be removed.

*To close this window, press the OK button

Encrypt with password

Some documents must remain confidential. You can add a password to make sure no unauthorized person can easily have access to the content.

Excel 2007 : Chiffrer le document

Make sure to remember your password. Otherwise, you won't be able to open the document anymore. Excel makes the distinction between uppercase and lowercase. A password like "OpenSesame" and "opensesame" won't be the same to Excel.

Altough Microsoft will protect your document, there are some "cracks" programs to determine the password and open the documents. You can only use these "tools" if you have the owner's permission.

Add a digital signature

To some documents, such as orders or bills, a digital signature may be required to confirm the authenticity of the document and of its approbation. Microsoft doesn't offer this service. However, you can integrate into Office 2007/2010/2013 from the Office Marketplace.

Excel 2007 : Signature électronique

*To view the list of electronic signature providers, select Services for electronic signatures from Office Marketplace.

Excel 2007 : Liste des services de signature électronique

A web page will appear with a description of companies that offers such services. You can click on the links to get the company's description. These services are not free. You must you expect to pay to the use digital signatures.

Check for issues


Excel 2010 - File tab - Info- Check for issues

You should always inspect a document before giving it to your superior. There was a story going around about an employe who left some nasty comments about is superior in the comments. He read them and wasn't pleased.

You should also check to see if your document respects the needs of people with disabilities.

You need to check for compatibility if you're working with people that use the previious versions of Excel. Some new options and functions will not work with older versions of Excel.

Inspect the document

An inspection of the document is required before sending it to a client or to a superior. The inspection could find items that they may not appreciate.

Excel will first you ask to save the document if you have made any modifications.

Excel 2007 : Inspecter le document

Excel will check some elements: comments, personnal information and others as show on the picture to the left.

*Press the Inspect to start the process.

Excel 2007 : Résultat inspection du document

The inspection takes a few instants before creating a report. Afterward, you can determine if any element of the list must remain with the workbook.

*Once finished, press the Close button.

Check accessibility


Check compatibility

Excel's 2007/2010/2013 file format is very different from the previous versions. There are more options that the user can manage and some new options (renamed funtions, slicers, sparklines...) You can still save a workbook under the previous versions. But, you should check for file compatibily before saving.

*Press the File tab and select Info.
*Press the Check for issues button.
*From the list of options, select Check Compatibility.

Excel 2007 - Vérificateur de comptabilité

The compatibility checker will you advise you that there may be a lost of data and of what type. Knowing what will stay and what will be lost, you can decide if you want to continue savin in a previous file format.

*Press the Continue.

Properties

Excel 2007 : Propriétés du workbook

Excel 2007: Propriétés avancées du workbook

There is also advanced properties that can give the user more information regarding the workbook. You can click on each tab to view the options.


Excel 2010 - File tab - Info - Manage versions

This option gives you the possibility to recover unsaved files.

Recent

Shows a list of workbooks and folders that were opened recently. You can quickly go back to a document you worked on recently.

Excel 2010 - File tab - Recent

New

You can create a new document by entering your values and use formatting styles available in Excel. Microsoft Office offers you another option. You can use templates that are already created and available with Office or get others from Office.com. It's a practical way of starting something new very quickly.

*Press the File tab and New.

Excel 2010 - File tab - New

You can choose a blank workbook and start to enter all the values in your model. You can also use a model offered by Office.com. A large collection of models are available in many categories. This could be very useful to use an existing model instead of instead of creating your own.

Note: You must be connected to the Internet to use this option.

*Select a model that's available the in one of categories under Office.com.

Excel 2007 : Chercher un nouveau modèle à partir de Microsoft Office Online

Excel 2007 : Nouveau document selon the modèthe disponibles

You can look from many categories that are available and download the ones you need.

*Select the model of your choice.
*Press Download.

Office genuine advantage

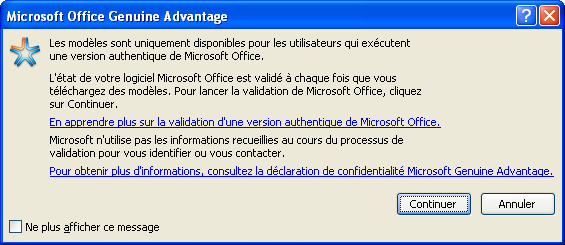
Microsoft Office will advise you that this option is only available to those who have a legal software copy. Office will check your software licence downloading the model you requested.

*To let Microsoft check you licence, and to let it download the model that you want, press Continue.

After a few moments, the model will be loaded in Excel.

Print

You always need to print your documents. However, you must preview it before printing to make sure that the result is what you expected. One of the great improvements in Office 2010 is the ability to preview the document and have the most common options on the left side. You can change these options and view the result without having to go back and forth to the Page Layout tab. But, for more specific options, you can select Page Setup located at the bottom of the options.

Print

*Select the File tab and Print.
OR
*Press on the CTRL and P keys.

Excel 2010 - File tab - Print

Quick print

This command sends immediately the worksheet directly to the printer without asking any questions or giving you any options. You can add this option to the Quick Access toolbar.

*Press the arrow at the end of the Quick Access Toolbar.
*From the menu, select More Commands.

You can access the same menu by selecting the File tab, the Options command and Quick Access Toolbar category.

*From the list of popular commands, select Quick Print and press the Add>> button.

The new command will be on the Quick Access toolbar. You can use the up and down arrows on the right side of the window to move the new option on the toolbar.


Save and Send

You can send your workbook by e-mail or by fax directly from your computer. However, the PC must be correctly configured and have access to an internet fax provider.

Excel 2010 - File tab - Save and send - E-mail

Send using E-mail

If Microsoft Outlook is also installed on your computer, and configured properly, you can send your workbook directly to someone else by e-mail.

Excel 2007 : Envoyer workbook par courriel électronique (courriel)

*Press the File tab and select Save and Send.
*From the list of options, select Send as Attachment.
*Enter the correspondant's e-mail, subject and text.
*Press Send.

Send a link

If the workbook is saved in a shared folder, where other people can access it. You only need to send an e-mail with a link to the file.

Send as PDF

Microsoft Office 2010 can also create an Adobe's Portable Document File, or PDF file. It's a very popular file format because the presentation remains the same on every other computer.

Send as XPS

Microsoft countered Adobe's PDF file format with its own XPS file format.

Send as Internet Fax

You can also send your workbook directly to any fax machine. But, your computer must be subscribed to an internex fax provider.

*Select the File tab and Save and Send.
*Select the options Send using e-mail and Send as Internet fax.

Office 2007 : Envoyer par télécopie Internet

Microsoft Office informs you that you must you subscribe to an internet fax provider before being able to use this option.

*Press the OK button.

Office 2007 : Liste des services de télécopie par Internet

You will be taken to a screen listing a few companies that offers fax services through the Internet. There is a link at the bottom of the screen to view the other services. You can click on the links to get a description of the company and the services it provides. There are costs related to theses services. Look carefuly before subscribing to any of these services.

Save to the Web

Microsoft Office can now access and place documents on Microsoft SkyDrive. That name has recently been changed to Microsoft OneDrive. Documents on the web can be accessed and shared on to any PC connected to the web.

*Select the File tab and Save and Send.
*From the list of options, select Save to the Web.

Excel 2010 - File tab - Save and Send - Save to web

Save to SharePoint

Many companies have a SharePoint server where they place their important documents; including Excel workbook files. These documents can also be shared with other people working at the company. It works the same way as a Save As but in a SharePoint folder.

Excel 2010 - File tab - Save and Send - Save to Sharepoint

Change File types

Excel 2010 - File tab - Save and SEnd - Change file type

Create PDF/XPS Document

Excel 2010 - File tab - Save and Send - PDF/XPS Document

Excel Options

Like all Microsoft Office applications, there are many options that the user can change to answer his or her needs.

General

*Select the File tab and Options.
*From the list of categories, select General.

Excel 2010 - File tab - Options - General


Excel 2007 : Mini-barre de sélection

Show Mini-bar on selection: It's a small toolbar that offers the most often used commands for the context (working on text, on pictures, on charts or any other object). This is very useful instead of always having to return to the Ribbon to apply a command.

Enable Live Preview: This is certainly the more useful option Microsoft added to Office 2007. It allows you to preview the result of an option before you select it! Try it by selecting the text and let the cursor hover the font size or the font colors. You will be able to see the possible result before you actually confirm it. This option applies to almost all the Office commands.

Excel 2007 : Onglet développeur

Developer tab: Very few people have enough experience to create of macro commands and even fewer to program with Visual Basic for Applications (VBA). It's for that reason that the Developers tab is masked in Office. You can activate it by checking the box Unhide the Developper tab on the ribbon.

ClearType: This option renders fonts that are more readable to the user.

Excel 2007 : Info-bulle

ScreenTip: This option allows you to have one short description of the command where the cursor is located. Place the cursor over the commands you don't know to have a description. You can get more help on the command from the Help icon to the right of the Ribbon.

Personalized List:To accelerate data entry, Excel offers a few predetermined lists for days and months. You can add your own list from your own data. This will make it easier to enter data that you use frequently like a list of shops or an inventory.

Excel 2007 : Listes personnalisées

Formulas

*Press the File tab.
*Press the Options .
*From the list of categories, select Formulas.

Excel 2010 - File tab - Options - Formulas

This section allows you to adjust how the formulas and the error checker will react in Excel.

Proofing

*Press the File tab and Options.
*From the list of categories, select Proofing.

Excel 2010 - File tab - Options - Proofing

Save

*Press the File tab andOptions.
*From the list of categories , select Save.

Excel 2010 - File tab - Options - Save

Language

This option is only available if you have installed a language module. You can quickly change the language on the Ribbon, and every command on it, by changing it in this menu and restarting the Office application.

Excel 2010 - FIle tab - Options - Language

Advanced

*Press the File tab andOptions.
*From the list of categories, select Advanced.

Excel 2010 - File tab - Options - Advanced

Customize Ribbon

It s'agit of commands that you can add to the la quick access toolbar. You can also détermer the order of commands for the bar.

*Press the File tab andOptions.
*From the list of categories, select Customize Ribbon.

Excel 2010 - File tab - Options - Customize Ribbon

Quick Access Toolbar

*Press the File tab andOptions.
*From the list of categories, select Quick Access toolbar.

Excel 2010 - File tab - Options - Quick Access Toolbar

Add-ins

Some people and companies created add-ins to make Excel even more useful. You can manage these "mini-applications" from this window.

*Press the File tab and Options.
*From the list of categories, select Add-ins.

Excel 2010 - File tab - Options - Add-ins

Trust Center

*Press the File tab and Options.
*From the list of options, select Trust Center.

Excel 2010 - File tab - Options - Trust Center

Excel 2010 - File tab - Options - Trust Center settings

Exit Excel

Like all Office applications, there are many ways of close the application.

*From the File tab, select Close.
OR
*Double click on the Excel icon at the top left of the window.
OR
*Press the Windows XP: bouton fermer fenbe or X according to your version of Windows at the top right of the window.
OR
*Press on the Alt and F4 keys.


You like what you read? Share it with your friends.


This site is hosted by 1&1.com